
|
AISpace2 | Main Tools | News | Downloads | Prototype Tools | Customizable Applets | Practice Exercises | Help | About AIspace |
|
|
Tutorials
Belief and Decision Networks
Tutorial Three: Querying a graph (Part I)Both this tutorial and the next will use the Fire Alarm Belief Network to demonstrate the basics of querying graphs. This tutorial will cover the rudimentary elements - making observations and performing simple queries. The Fire Alarm Belief Network will look like the figure below: 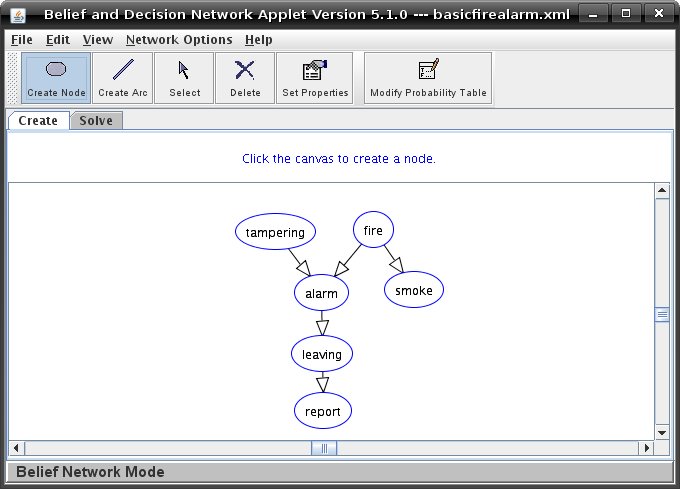 Click on the 'Solve Tab' to switch to Solve Mode, where you can start making observations, among other things. The Solve Toolbar, for Belief Networks, looks like the figure below:  To make an observation, you can right-click on the node and select 'Make Observation for Node', or click the 'Make Observation' button on the Solve Toolbar and then click on a the node. When you do so, you will see a dialog box such as this one: 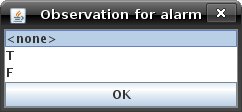 Select the value you want, or '<none>' to clear the observation, and click 'OK'. The value you select will be displayed beneath the node name. There are two principal ways in which you can gain information about a node's probability. The first way is monitoring. When a node is set as monitored, information about its probability will be displayed below its name, and that information will be updated as observations are made about the probabilities of other nodes that affect it. A node which has already been observed cannot be queried, as its probabilities are known. You can set a node to be monitored by right-clicking on it, and selecting the option 'Toggle Monitoring of Node'. To stop monitoring a node, toggle the monitoring again. You can also Toggle the Monitoring by clicking 'Toggle Monitoring' on the toolbar and then clicking on a node. Monitoring is automatically stopped for a node when you observe a particular value for it. Below is a picture of the Fire Alarm Belief Network, with tampering observed to be 'True' and some other nodes being monitored.  The second way to gain information about a node's probability is querying. There are three different query modes for the applet: Brief, Verbose, and Prompt. The default setting is Prompt mode. In this mode, each time you attempt to query a node, a dialog will open asking whether you would like a Brief or Verbose query. This dialog looks like the figure below: 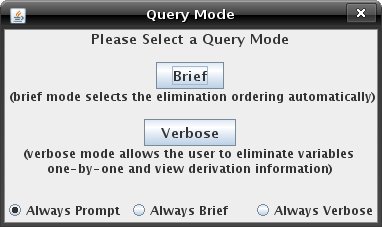 You can change the mode from 'Network Options->Query Modes' and selecting the radio button next to the desired mode. You can also change the mode in the Prompt dialog by selecting the appropriate radio button at the bottom of the window. If you click on 'Brief' a window will open showing the node's probabilities, and it will list any observations you have made. Below is a picture of the Brief query window with tampering observed to be 'True' and alarm observed to be 'False'. 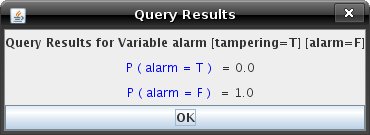 Verbose Query Mode will be covered in the next tutorial. The conditional probability tables that are used in calculating the probabilities of each node can be viewed by right-clicking on that node, and selecting 'View Probability Table' or by clicking on the 'View Probability Table' button on the toolbar and then clicking on a node. A window will open with information about the node's probability given values for each of its parents. The same information appears in Create Mode when you Modify the Probability Table for a node. |
| Main Tools: Graph Searching | Consistency for CSP | SLS for CSP | Deduction | Belief and Decision Networks | Decision Trees | Neural Networks | STRIPS to CSP |