
|
AISpace2 | Main Tools | News | Downloads | Prototype Tools | Customizable Applets | Practice Exercises | Help | About AIspace |
|
|
Tutorials
Graph Searching
Tutorial Three: Solving a GraphThis tutorial will use the Simple Tree Graph to demonstrate the basics of solving graphs.
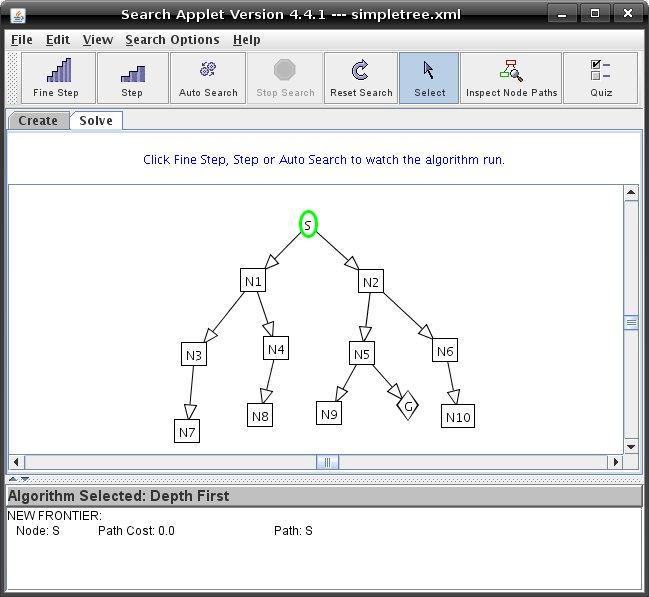 When you change to Solve mode, a new panel at the bottom of the screen appears which contains the text stating which algorithm is selected and an area which contains the current path of the graph. If you would like to modify the graph, click on the tab marked 'Create' to return to create mode. The idea of searching is to find the path along the edges from a start node to a goal node. There are four ways to
run a search algorithm.
When you are stepping through a graph, the nodes on the graph change colors corresponding to the type of nodes they are. In the 'Help' menu you can click on 'Legend for Nodes/Edges' to make the legend below appear. 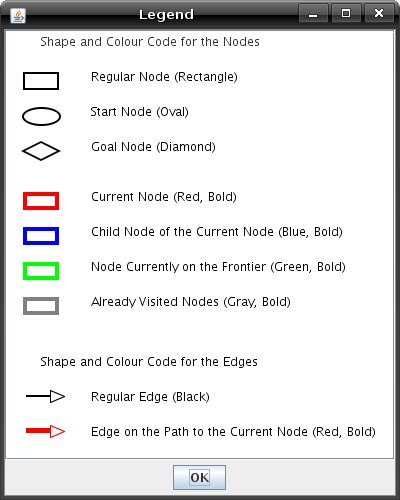 When you have found a goal node, a dialog box appears showing you the path to the goal node. The graph will look similar to this: 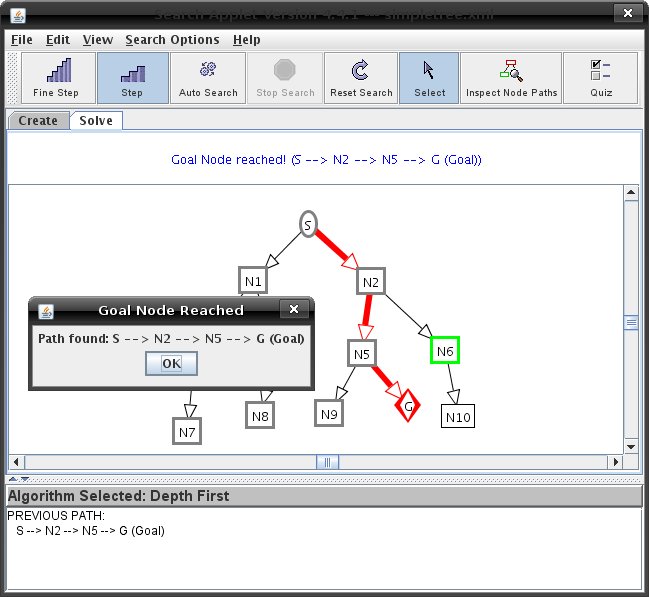 There are many different algorithms used to solve a graph and they differ in the way they choose the next node on the frontier. To learn more about different searching algorithms, see Tutorial 4 on search options. Explore the different search algorithms and see which algorithm will find the shortest path from the start node to the goal node. You can reset the graph after a goal node has been reached by clicking on the 'Reset Search' button. For graphs with cycles in them you can change the path pruning options to either loop detection, multiple-path pruning or none. You can do this in the 'Search Options' menu. To learn more about different pruning options, see Tutorial 4 on search options. |
| Main Tools: Graph Searching | Consistency for CSP | SLS for CSP | Deduction | Belief and Decision Networks | Decision Trees | Neural Networks | STRIPS to CSP |